Summary
This guide demonstrates how to configure a MikroTik RouterOS device as a Core Transit WireGuard client using a /32 tunnel address and a default route through the WireGuard tunnel.
Unlike a traditional site-to-site deployment, this configuration sends all outbound Internet traffic through the Core Transit network while maintaining a dedicated route to the WireGuard endpoint over the local WAN connection.
The guide also covers the additional routing and NAT configuration required for LAN clients to successfully access the Internet through the tunnel.
Prerequisites
- MikroTik router with factory default configuration
- Active Internet connection
- Core Transit WireGuard configuration
- Administrative access to WebFig or WinBox
How This Configuration Works
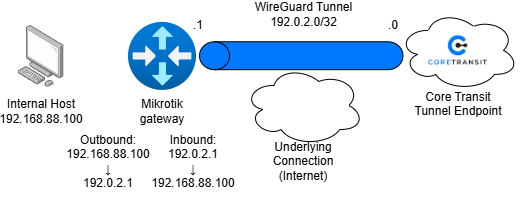
Before beginning the configuration, it is helpful to understand the traffic flow.
The MikroTik establishes a WireGuard tunnel to the Core Transit network. Rather than forwarding only selected traffic, the router installs a default route through the tunnel so all outbound traffic is sent to Core Transit.
Because the WireGuard endpoint itself is located on the public Internet, an additional host route is required to ensure the router always reaches the endpoint through the local ISP rather than attempting to reach it through the tunnel.
LAN clients continue using the MikroTik as their default gateway. Their traffic is source NATed (masqueraded) before entering the WireGuard tunnel.
Benefits
- Secure encrypted tunnel
- Full-tunnel Internet connectivity
- Centralized public IP
- Consistent outbound addressing
- easy migration between Internet providers
- Automatic failover capable
- No client-side software required
Use Cases
- Remote Office Internet Breakout – Route an entire branch office through Core Transit while keeping local ISP connectivity simple.
- Temporary Disaster Recovery – Redirect all Internet traffic through a Core Transit tunnel without changing client configurations.
- Public IP as a Service – Present a consistent public IP regardless of the underlying ISP connection.
- Security Inspection – Forward all Internet traffic through centralized security appliances before reaching the internet
Diagram
Verify WAN DHCP
On the left=hand side of the Mikrotik UI locate “IP”, and then “DHCP Server”. Ensure that the DHCP server is running. If you wish to customize the DHCP address pool, this can be done in the “Pool” subsection of “IP” settings.
Verify that the Internet connection is functional.
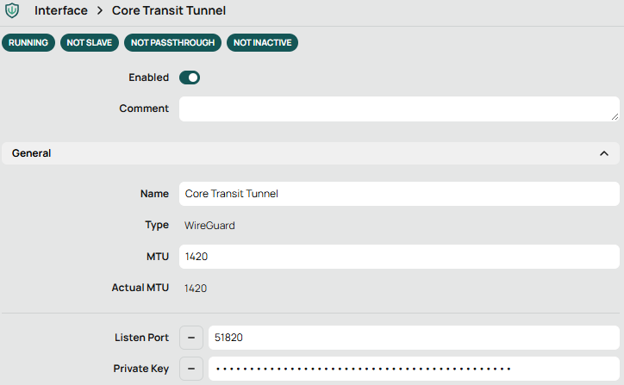
Configure WireGuard
Navigate to the “WireGuard” settings and create a new interface. Name the interface “Core Transit Tunnel” and paste the PrivateKey provided to you by Core Transit. A public key will automatically be generated. Use 51820 as the Listen port. Change the MTU size to match the configuration Core Transit has provided. The page should look something like this:
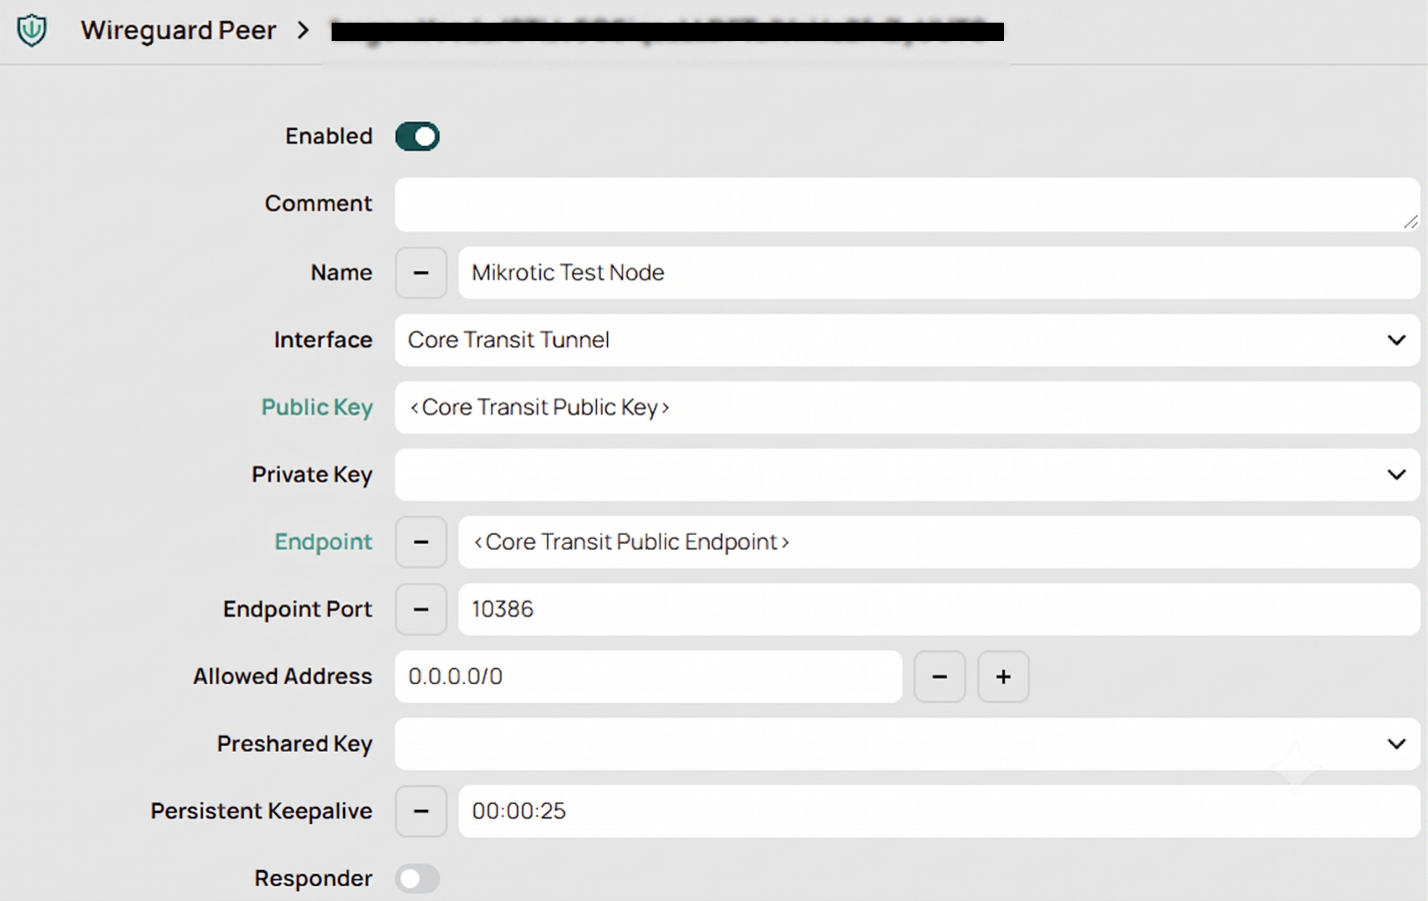
Configure WireGuard Peer
In the WireGuard settings, find the “Peers” tab and navigate to it. Create a new peer and enter the PublicKey, Endpoint, and Port provided in the Core Transit configuration. Ensure that “Allowed Ips” is set to 0.0.0.0/0. A “Persistent Keepalive” of 00:00:25 is recommended (25 seconds). The “Peers” page should look something like this:
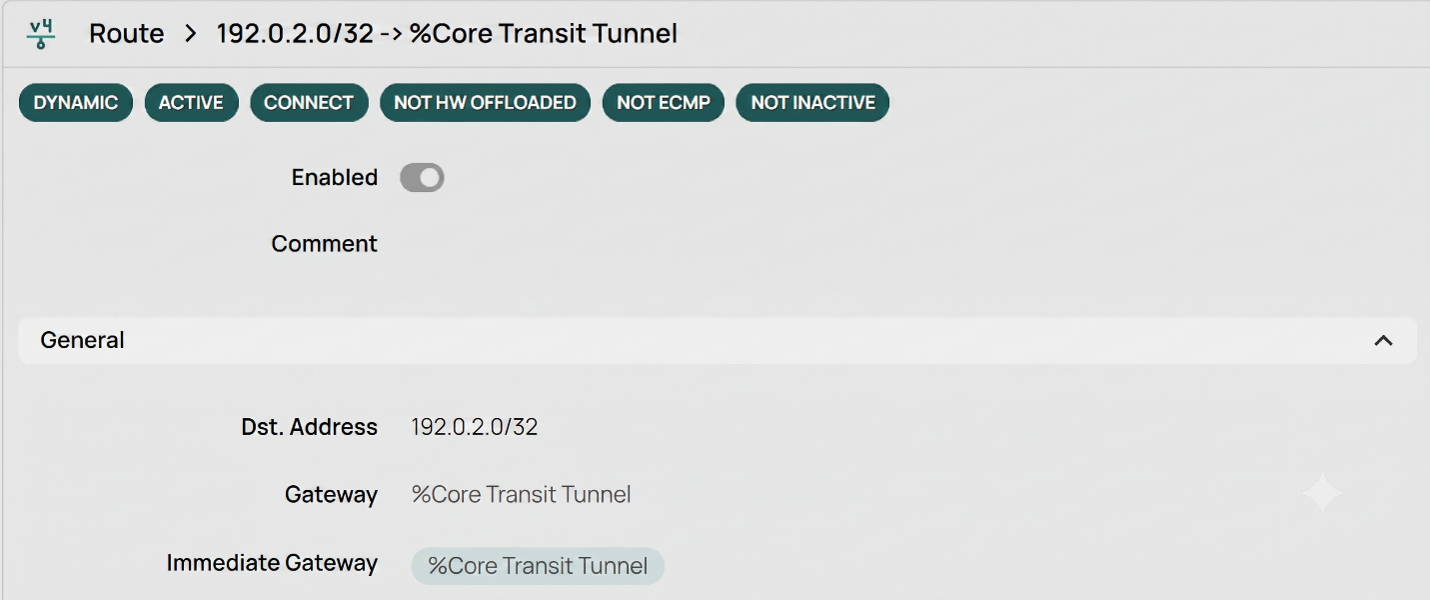
Create Tunnel Host Route
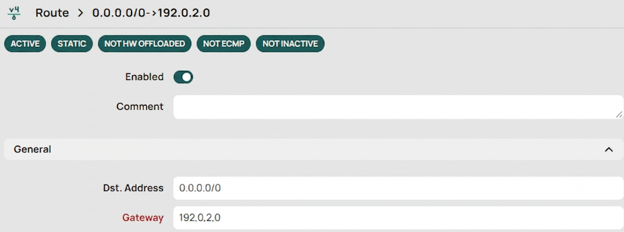
Navigate to “IP” and then “Routes”. Create a new route with destination “0.0.0.0/0”. Then in the Gateway field enter the address for the tunnel endpoint facing Core Transit. This tells the RouterOS how to reach the remote tunnel IP. The page should look something like this:
Route All Traffic Through Tunnel
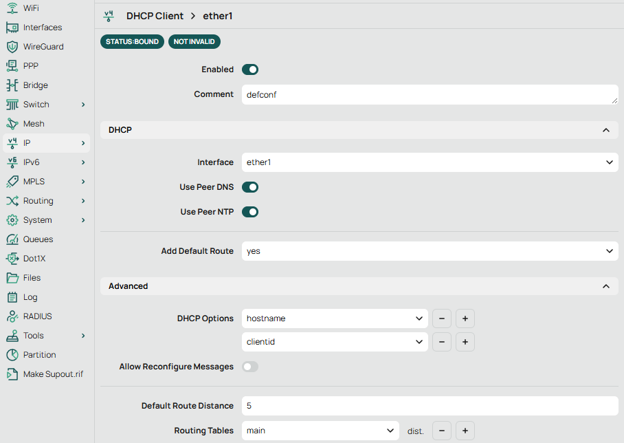
Remaining on the “Routes” page, create another route with destination “0.0.0.0/0”. This Route will use the endpoint on the Core Transit side again. Use the same Gateway used in the Host route, the Core Transit facing tunnel endpoint. Set the “Distance” field to 1, then under “IP” go to “DHCP Client” and click on the default route, under “Advanced” change the “Default Route Distance” to 5. This keeps the WAN route as a backup. This should appear as follows:
Setting the default route to have 5 Distance looks something like this:
Prevent Routing Loop
Prevent Routing Loop
Next, we will create one more route. This route will use the Core Transit Public IP as the “Destination” and your WAN IP as the “Gateway”. Ensure this route has a “Distance” of 1. This forces the WireGuard endpoint to stay on the WAN while everything else uses the tunnel.

Configure NAT
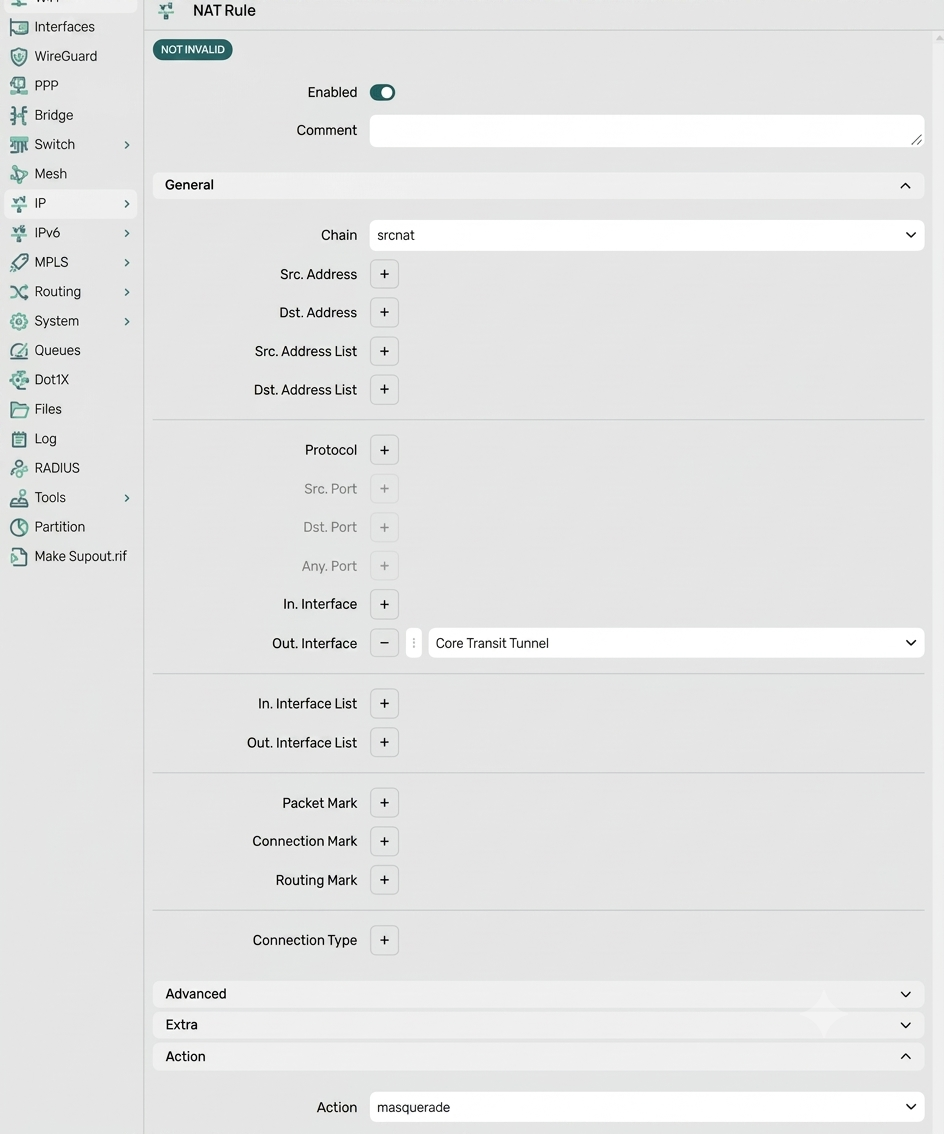
The default masquerade rule only applies to the WAN interface list. Because Internet now exits via WireGuard, create another NAT rule. Navigate to “IP” then “Firewall” and select the “NAT” section at the top of the UI. Create a new NAT rule with “srcnat” selected from the dropdown menu beside “Chain”, then select “Core Transit Tunnel” as the “Out. Interface”. Then select “masquerade” from the dropdown menu beside “Action”. Leave the default WAN NAT rule in place.
Verify
Use ping commands to ensure Internet browsing works and DNS work. Check your public IP to see if it’s Core Transit.
Additionally, it’s always a good idea to check if you are connected to the lowest latency Core Transit Server. Follow the link below.


