pfSense permits a lot of flexible firewall and routing configurations. In this example, we have a pfSense firewall behind Network Address Translation (NAT) as would be the case with Starlink or some other service providers and would like to route a static /32 IPv4 address to the pfSense from Core Transit. From a network topology perspective, the architecture will look like the depiction below.
![]()
Configure L2TP Client
The first step in configuring the pfSense appliance is to configure an L2TP interface toward Core Transit.
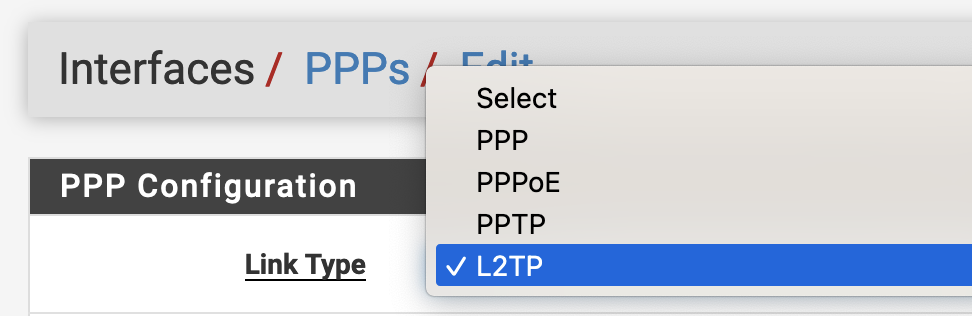
To get started, navigate to Interface > PPPs and select “Add”. You will want to select the L2TP Option under "Link Type".
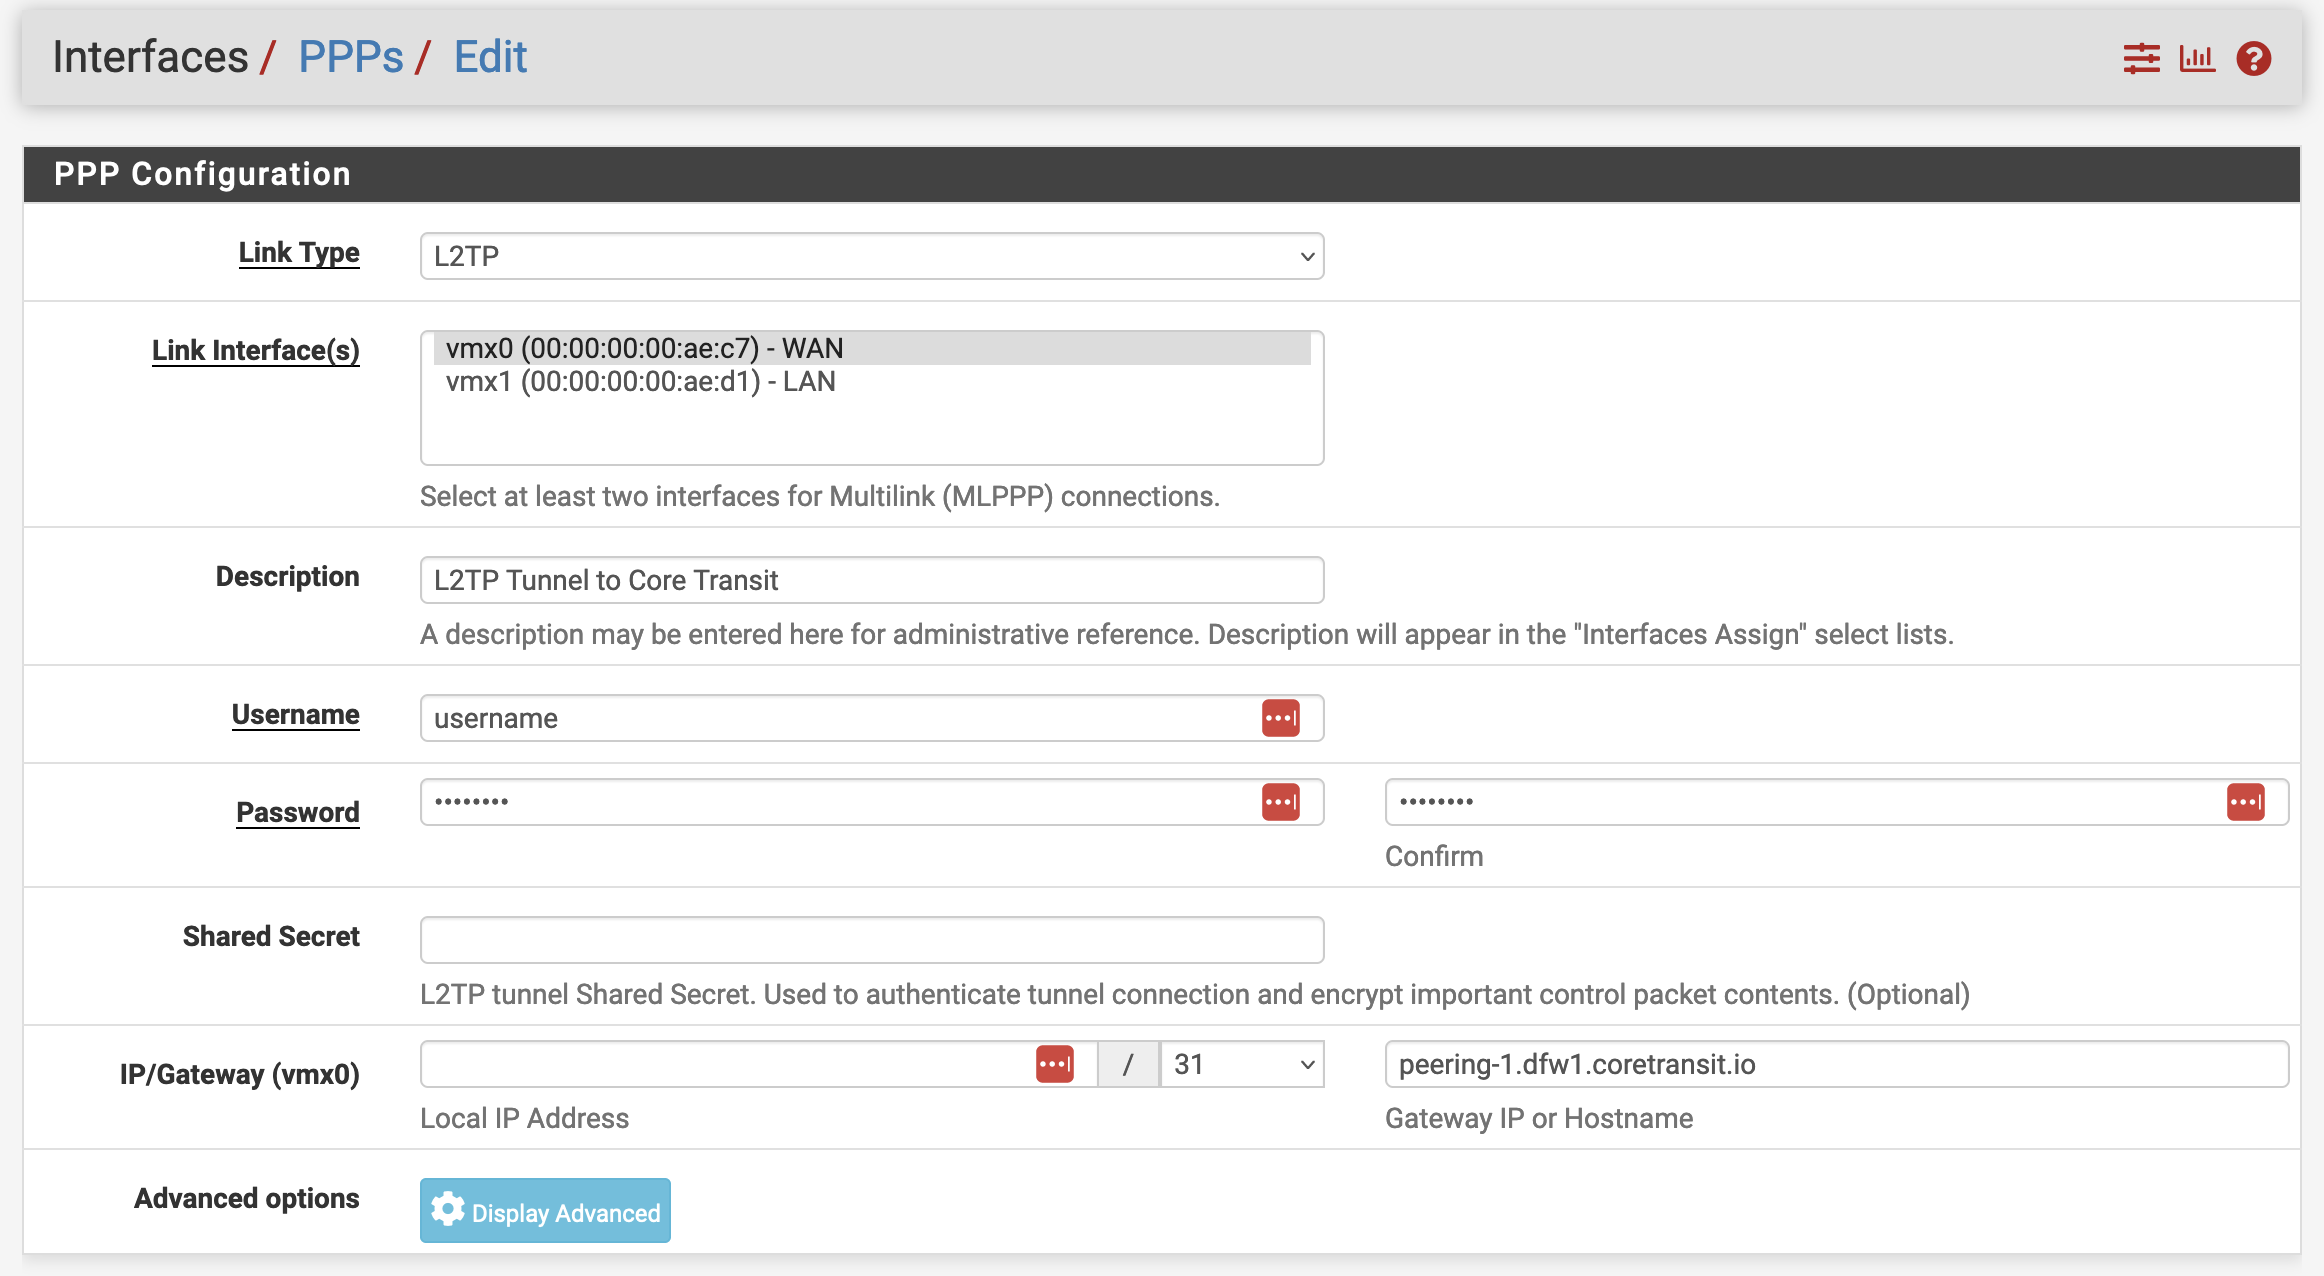
Here you want to configure the L2TP client with the information provided by Core Transit. Note, that your username and password will be for this specific tunnel and are not the same as your portal credentials. Core Transit will typically send you an email with this information included as well as the IP subnets that will be routed to you.
The Core Transit L2TP service is not encrypted to permit the highest performance and highest MTU values. End users should implement their own security mechanisms when applicable. For this reason, the “Shared Secret” will be left blank.
Finally, enter the hostname of the tunnel server you have selected. In this example, we are routing through Dallas with peering1.dfw1.coretransit.io. When these details are keyed in, click save. Your configuration will look similar to the screenshot below.
Assign the L2TP Client to an Interface
At this time the client is configured but not yet connected. Navigate to Interfaces > Assignments. You will see “Available network ports:” and the name of your newly added L2PT Client. Click “Add”.
This will create an interface for the client. Typically OPTx, where x is the interface number starting at 1. Click “Save”. Once added the interface will be name as shown in the screenshot below.
Enable and Test L2TP Connection
Navigate to the Interfaces dropdown menu and select the interface you just added opening the interface configuration page. You should see your L2TP settings and other information listed on this page. From here, check the “Enable Interface” option at the top of the page and click Save and then “Apply Changes”.
This should bring up your L2TP interface and it should authenticate. You can verify the interface status under the Status > Interfaces menu. If the interface is not connected you can attempt to connect wit with the “Connect” button.
An online interface will look similar to the one below. Note the In/Out Packet counters will both have incremented above 0 if traffic is moving between your system and Core Transit. 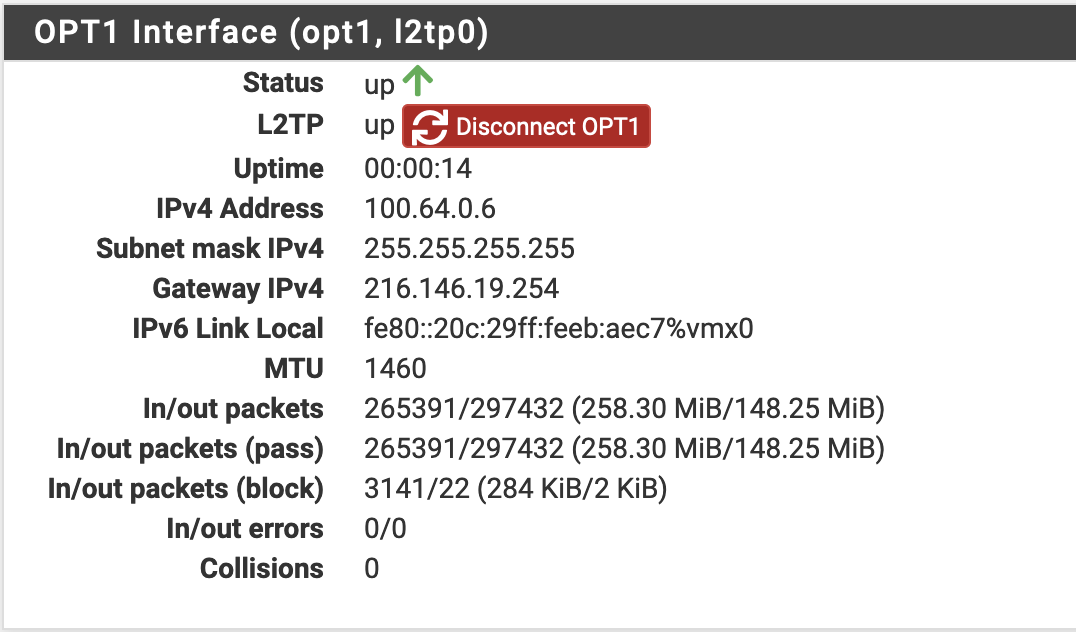
If you have issues connecting verify the connection details and consult the log files for PPP clients at Status > System Log > PPP.
Configure Routing
With the L2TP interface online it's time to configure routing. From a Core Transit perspective, our default configuration option is to route your IP block toward your L2TP interface and then let you assign it however you would like within your network. This differs from typical L2TP client configuration where the L2TP interface is assigned the IP address directly. We do this to be able to route more than a single IP address to our customers if desired.
To allow your pfSense to leverage the L2TP interface as its default route navigate to System > Routing. Under “Default Gateway” select the L2TP interface. Click Save and Apply Changes.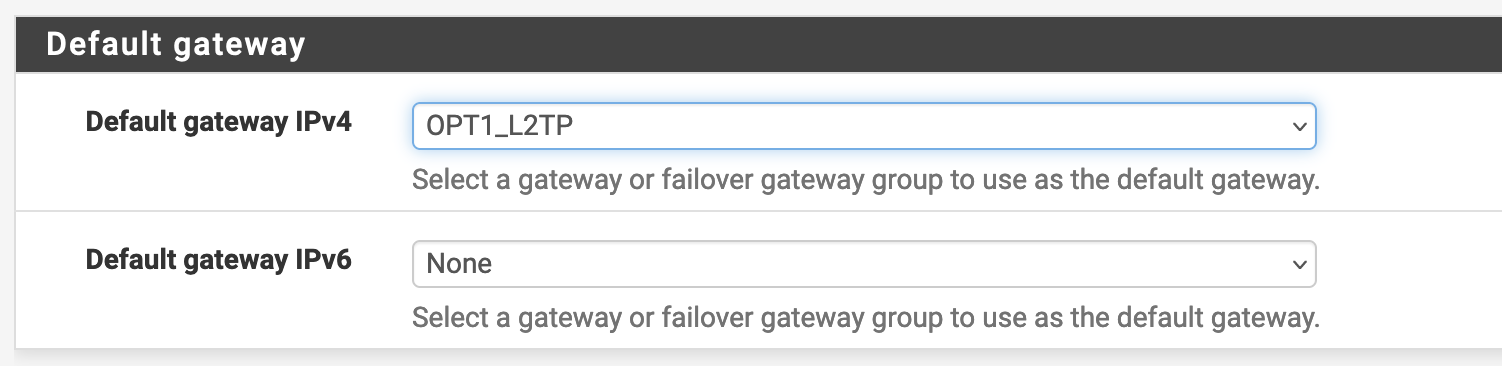
NAT Configuration
In this example, we will assume you will NAT the public Core Transit IP Address(es) through your firewall in one way or another. This could be for client overload usage, 1:1 to a server, a port address translation, or a port forwarding use case.
Client NAT
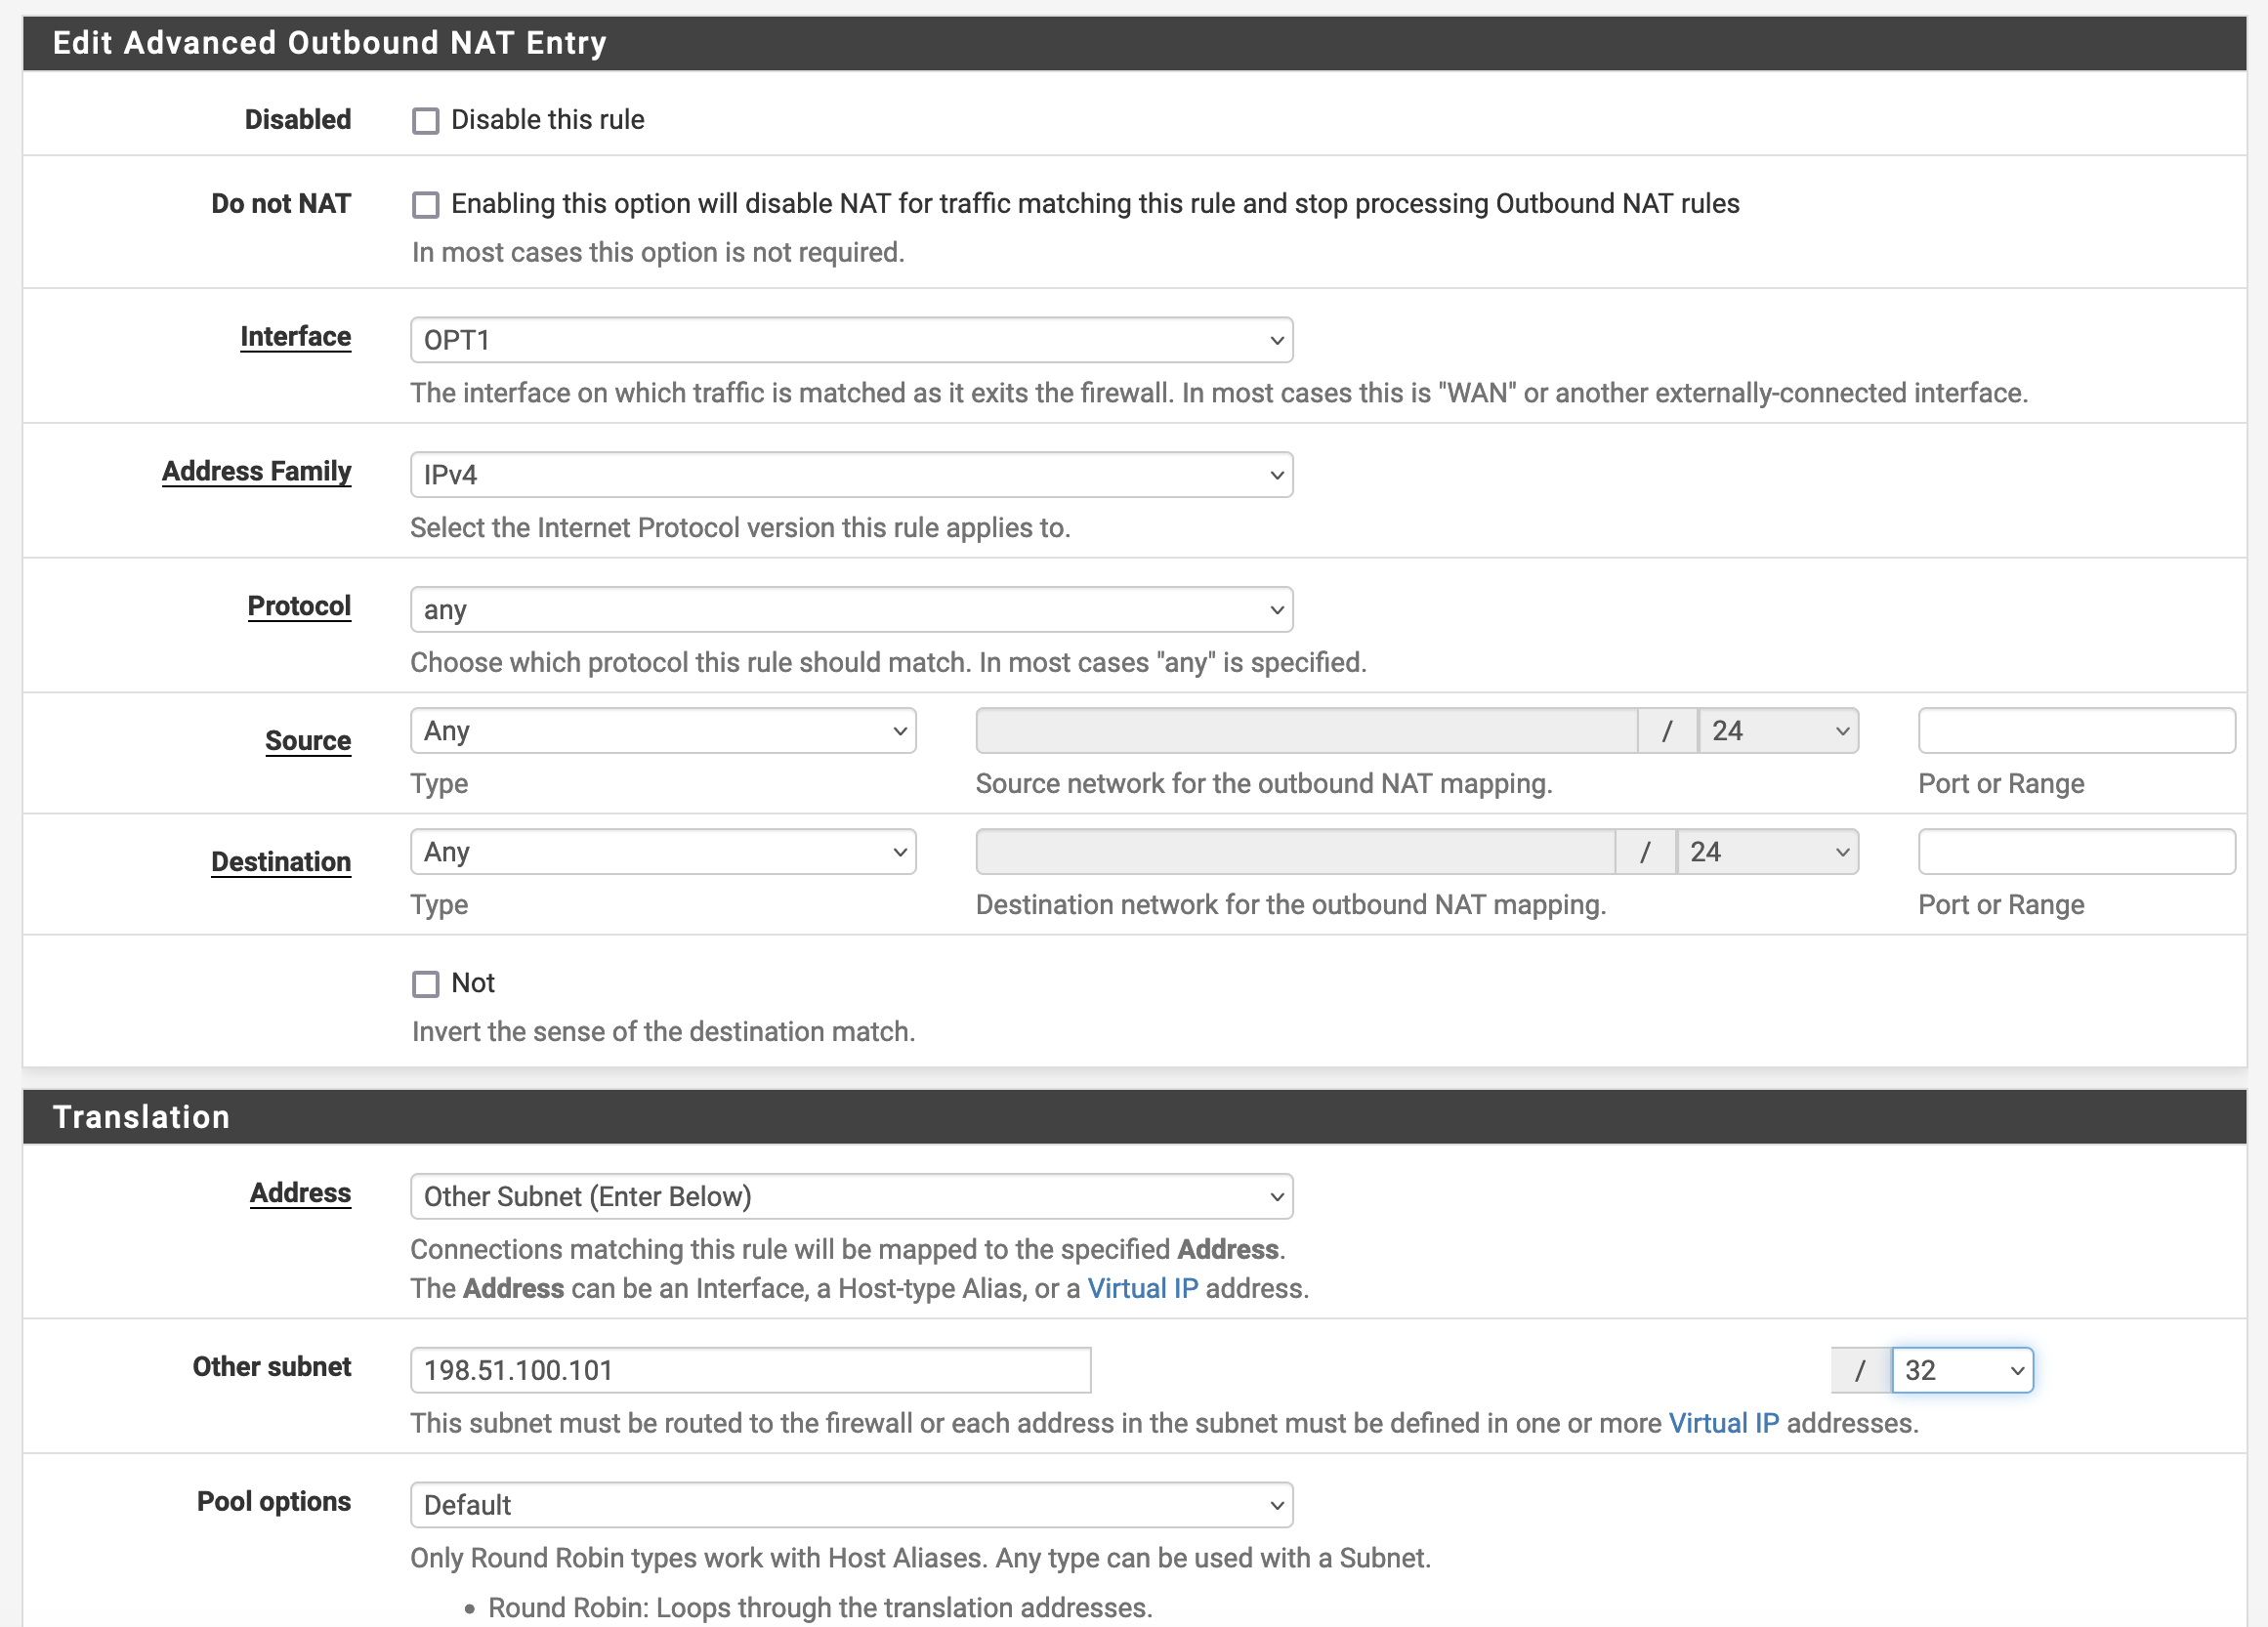
To configure basic NAT for clients, navigate to Firewall > NAT > Outbound. We suggest configuring all NAT rules manually as the default rules will typically route traffic out the WAN interface instead of the L2TP Tunnel interface.
- Add a new NAT rule with the green “Add” button. Note the specific settings in the screenshot below.
- Set Interface to your L2TP Interface.
- Configure Address Family as “IPv4”.
- For Source, you can select “Any” for anything behind your firewall or define your internal subnet(s).
- Under the “Translation” heading, change “Address” to “Other Subnet”. This will allow you to define the specific IPv4 address the Core Transit is routing toward you. In our example, the customer is leasing 198.51.100.101/32 so we will assign this address as the “Other Subnet”.
With this configuration in place, you should now be able to connect with your clients through the pfSense to the wider internet using the L2TP connection and IPv4 address from Core Transit.
Port Forwarding
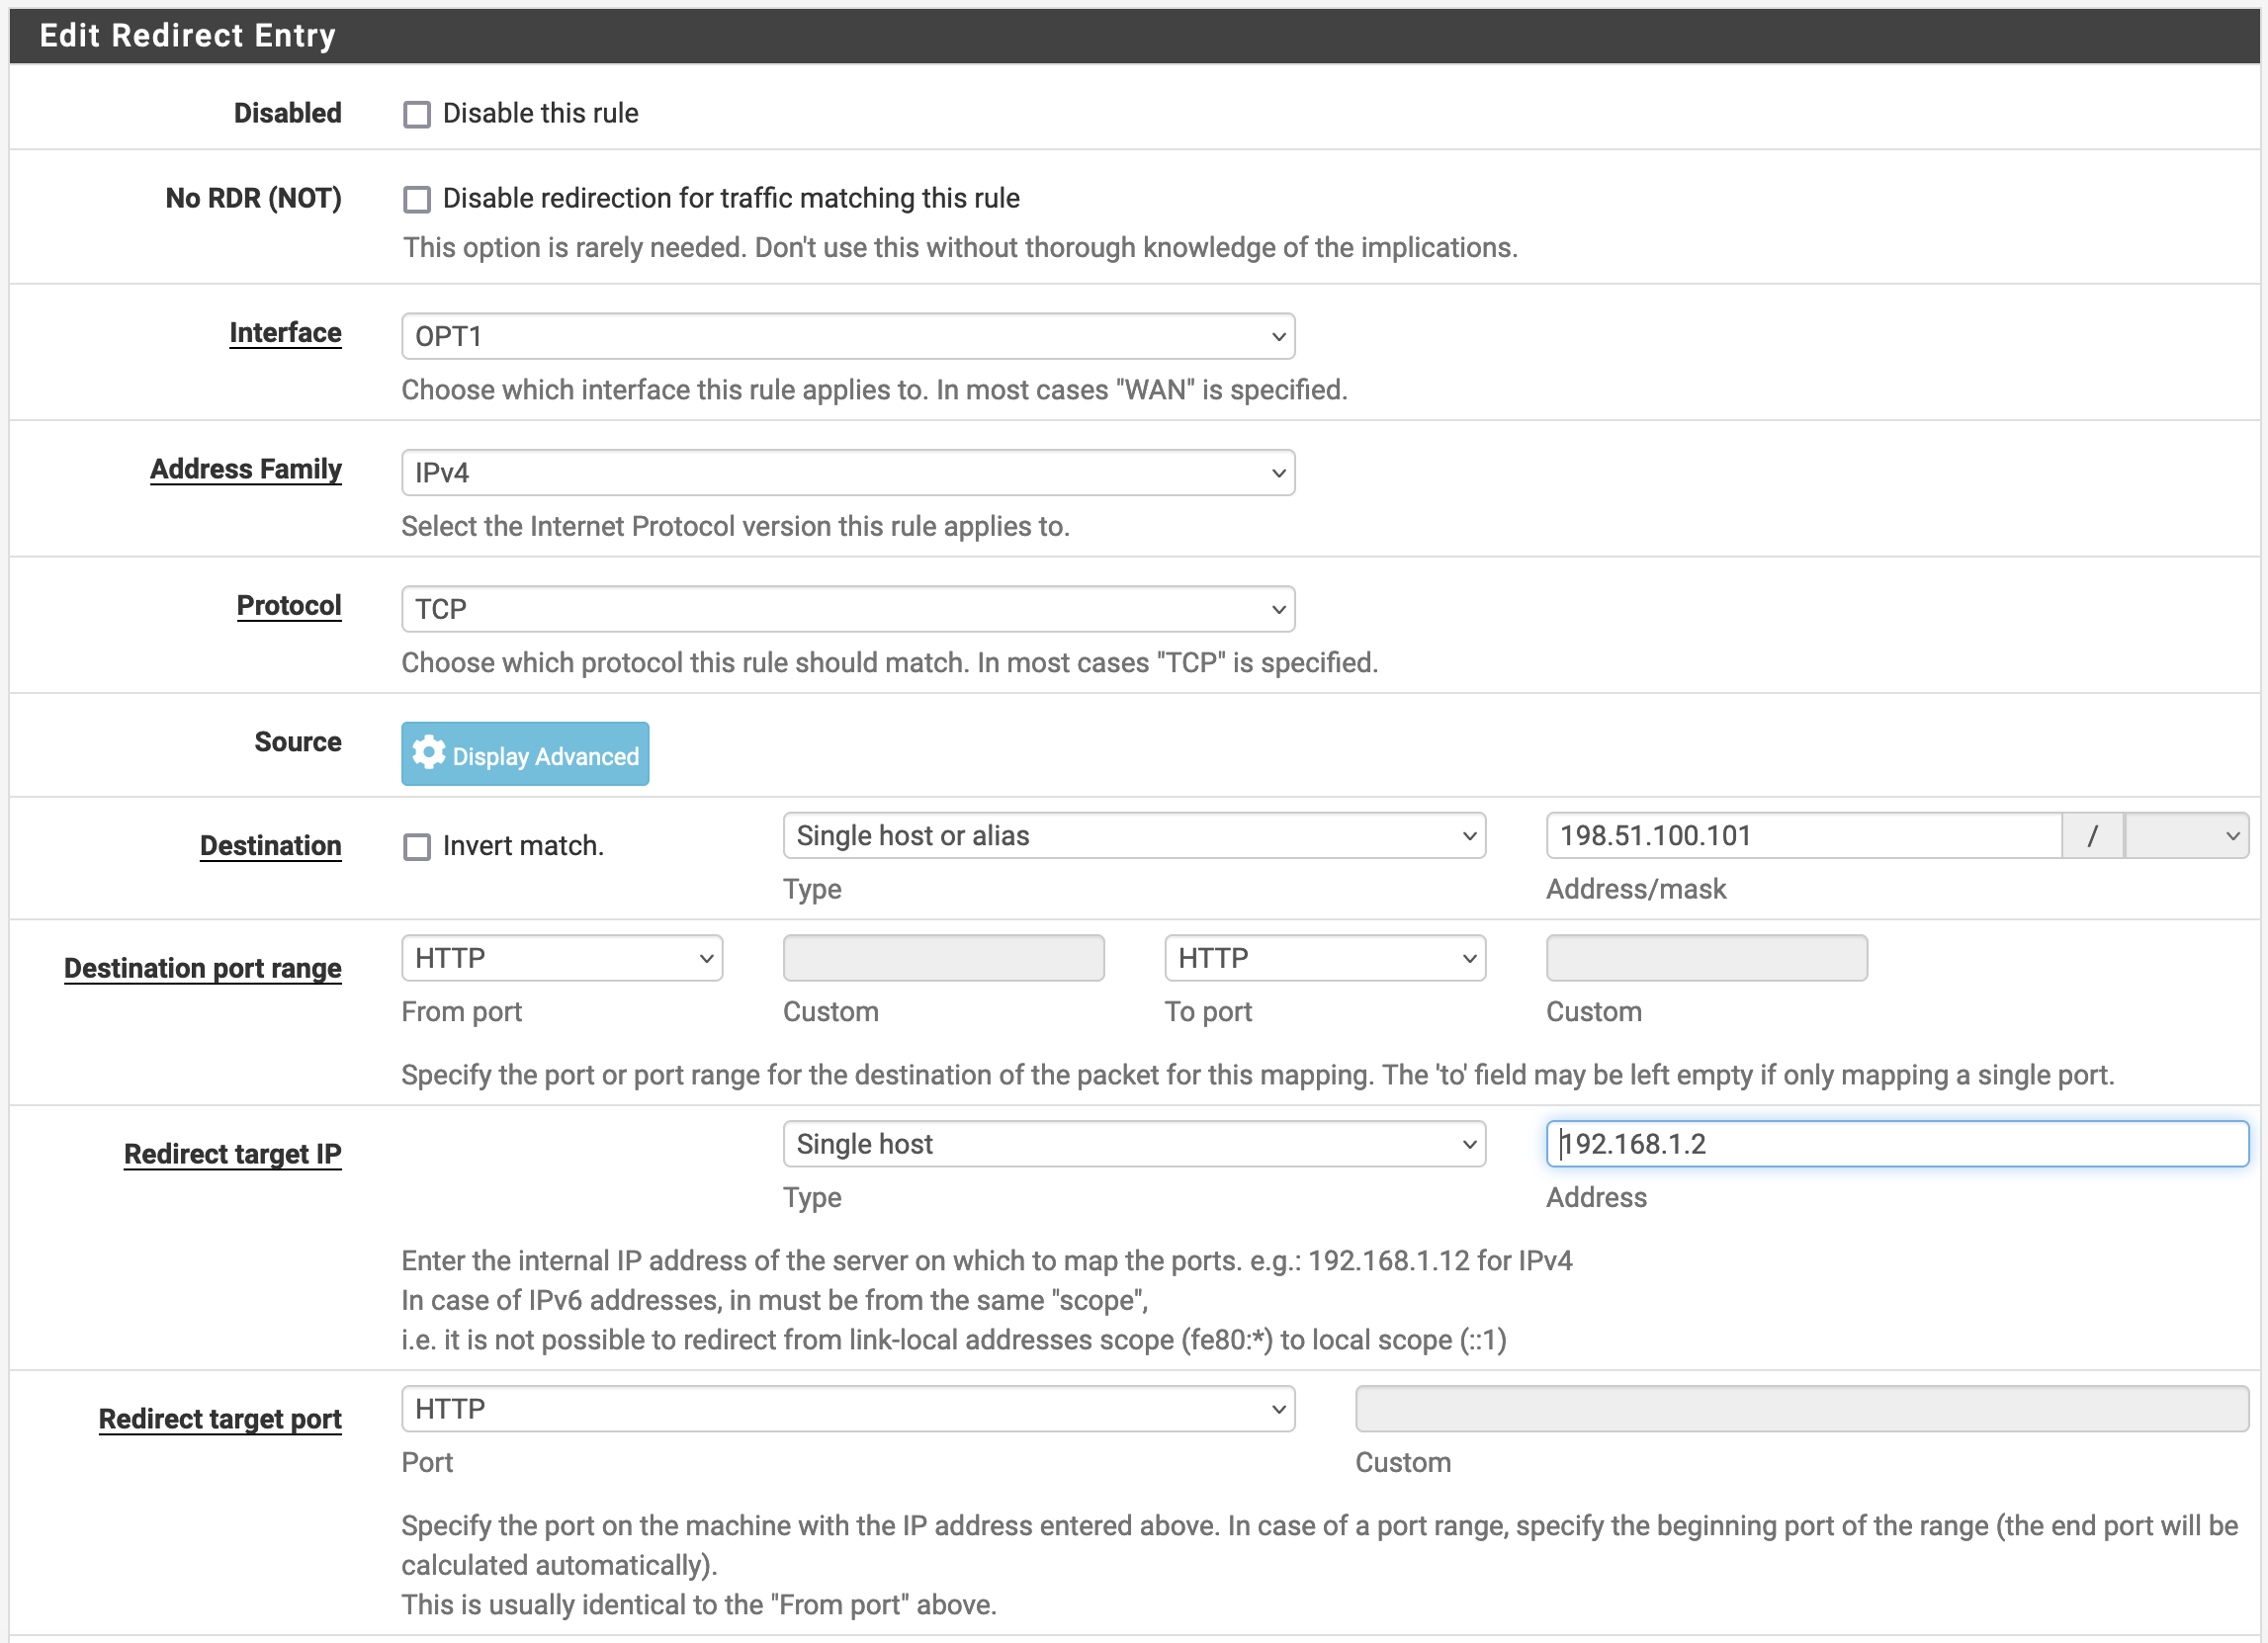
To Port forward to a server or other system on your network, navigate to Firewall > NAT > Port Forward and click “Add” to add a rule. In our example, we will port forward port 80 to an internal server, 192.168.1.2.
- Toggle the interface to be your L2TP interface.
- Select the applicable protocol, in our case TCP.
- For Destination, you will want to toggle to “Single Host or Alias” to key in the IP address provided by Core Transit. In our case, 198.51.100.101.
- For Destination Port Range we simply selected HTTP to HTTP.
- To map to an internal host select, “Single Host” in the “Type” dropdown and key in that host's IP address in the Redirect Target IP section.
- Finally, under “Redirect Target Port” select HTTP as well.
Conclusion
In conclusion, the pfSense platform is a flexible firewall and routing platform that works well with Core Transit's L2TP tunneling services. If you have any questions or think there might be a configuration issue in the Core Transit network impacting your service please open a ticket with us!


