Summary
This guide demonstrates how to configure a GL.iNet router to use a Core Transit WireGuard tunnel and host a service behind the tunnel using a routed public IP address.
In this example, a Core Transit static IP service provides a routed public IP block across a WireGuard tunnel. The GL.iNet router forwards inbound traffic received on a public IP address to an internal web server located on the LAN.
By the end of this guide, the GL.iNet router will:
-
Establish a WireGuard tunnel to the Core Transit network
-
Route traffic destined for the assigned public IP through the tunnel
-
Forward inbound connections to an internal server using Destination NAT (DNAT)
-
Allow forwarded traffic through the firewall
-
Return traffic through the tunnel using Source NAT (SNAT)
This configuration allows Internet users to access services hosted on private LAN devices while using public IP addresses provided by the Core Transit static IP service.
Use Cases
- Secure remote access to internal devices
- Access to routed public IP services provided through the tunnel
- Hosting services behind a NAT-enabled edge router
- Connecting to cloud services that whitelist users by public IP address
- Testing and development environments requiring public IP connectivity
- Secure management access to lab equipment and servers
Adding Tunnel (WireGuard)
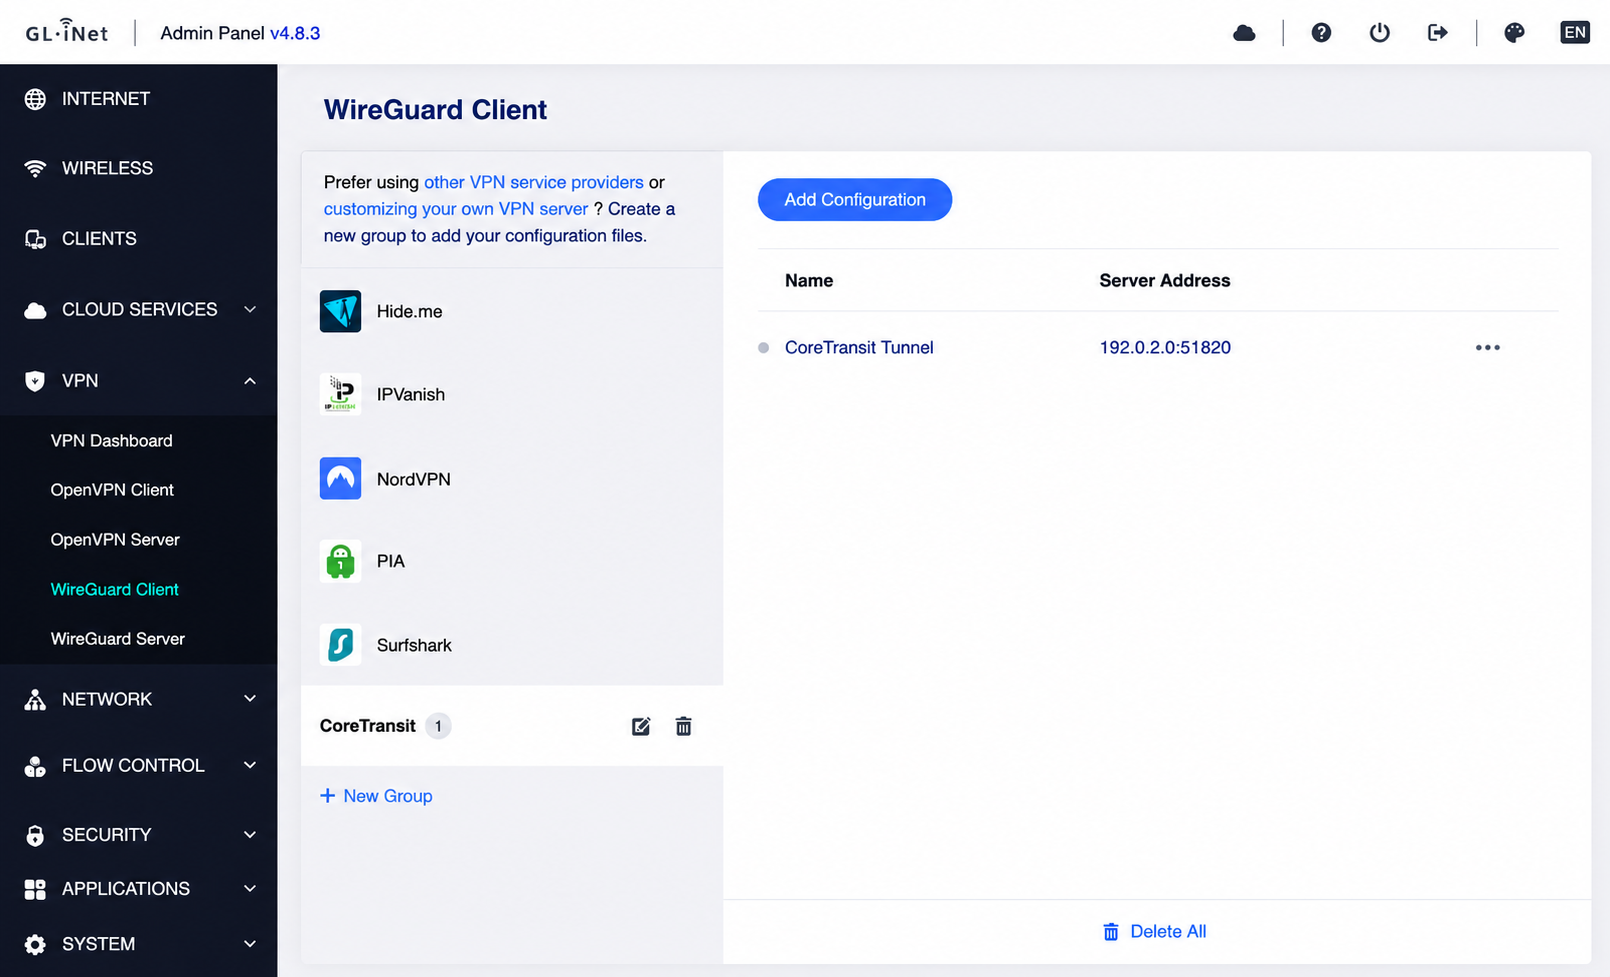
Once logged into the GL.iNet Admin Panel, go to the VPN tab and then into WireGuard Client. Select “+ New Group” and give it a name, we will call it “CoreTransit”. On this same page, there should be the option to upload a WireGuard configuration file, which is provided by CoreTransit. There is also an option to write the configuration in manually. Once the configuration file is uploaded, the UI should look something like this (note: IP addresses and port numbers will vary in your configuration):
Now, if you go to the VPN Dashboard, select the newly uploaded configuration file and apply it. Make sure to click on the “ON/OFF” switch at the top-right corner of the panel to activate the tunnel. The VPN Dashboard should look something like this:
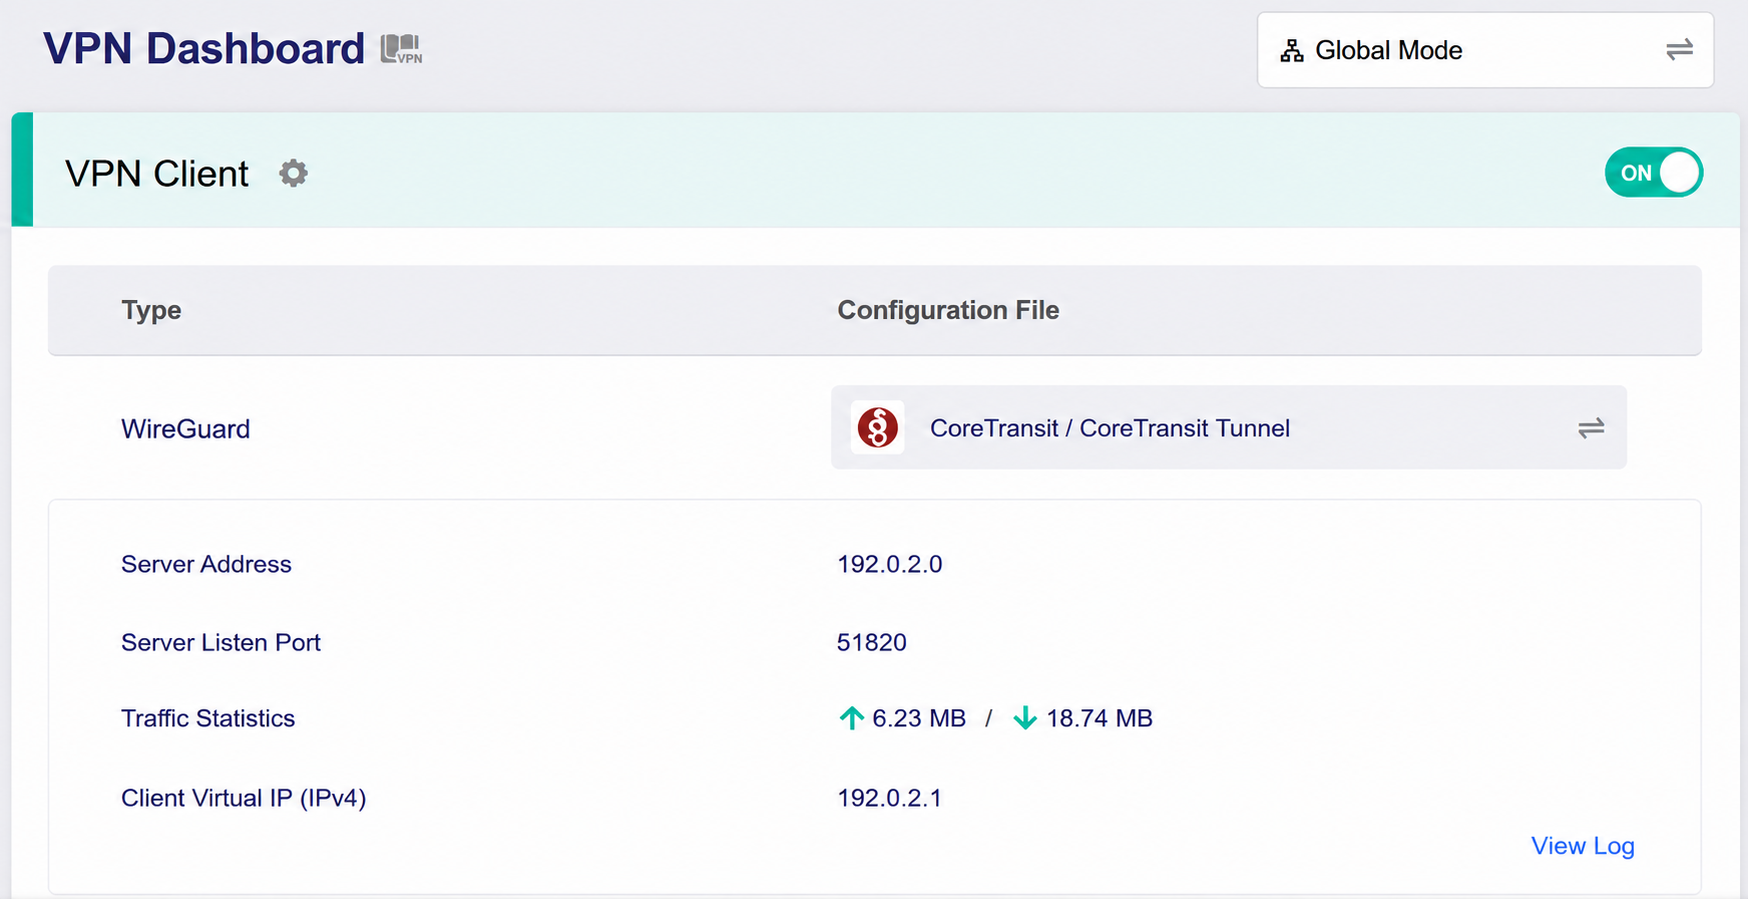
Above the ON/OFF switch notice a pop-up menu that holds “Global mode” and “Policy Mode”.
NAT Masquerade Behavior on GL.iNet Routers
GL.iNet routers enable NAT masquerading on the WireGuard client interface by default. In most deployments, no additional NAT masquerade configuration is required for outbound traffic to use the tunnel.
This behavior is managed automatically by the underlying OpenWrt firewall configuration and may not be visible in the standard GL.iNet administration interface.
You can verify that masquerading is enabled by connecting to the router via SSH and running:
uci show firewall | grep masq
Example output:
firewall.wgclient1.masq='1'
A value of 1 indicates that NAT masquerading is enabled on the WireGuard tunnel interface.
The inbound NAT rules described later in this guide are separate from NAT masquerading. They are only required when hosting services behind the tunnel and accepting inbound connections on a routed public IP address.
Routing Modes
Global Mode
Global Mode routes all LAN client traffic through the configured tunnel. Any device connected to the router will use the connection as its default path to the Internet unless specific exceptions are configured.
Advantages
- Simple to deploy and manage.
- Ensures all connected devices benefit from tunnel's connectivity.
- Provides consistent public IP presentation for all clients.
- Ideal for securing an entire network behind a single tunnel connection.
Common Use Cases
- Small office or home networks that need to connect to cloud services with white-listed IP requirements.
- Maintaining a consistent static IP address while traveling or operating on a dynamic network (such as LTE or Starlink).
- Testing and validation of tunnel connectivity.
- Environments where all traffic should traverse a WireGuard tunnel vs being dropped off to the underlying connection.
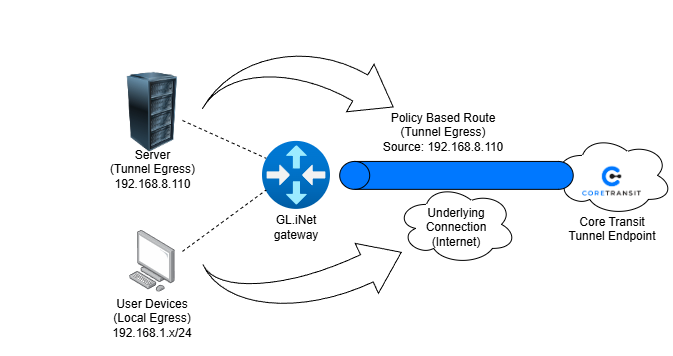
Policy Mode
Policy mode allows administrators to select which devices use the tunnel and which devices use the normal WAN connection. Routing decisions are made on a per-device basis.
Advantages
- Greater flexibility and control.
- Reduces Core Transit bandwidth consumption by limiting tunnel usage to specific devices.
- Allows local services and devices to remain on the normal Internet connection.
- Supports mixed environments where only certain hosts require Core Transit static IP connectivity.
Common Use Cases
- Routing servers, lab equipment, or management devices through a WireGuard tunnel.
- Allowing employee workstations to use the tunnel while guest devices use the standard WAN connection.
- Testing tunnel connectivity without affecting the entire network.
- Policy-based routing deployments.
Diagram of Policy mode
Hosting a Service Behind the Tunnel
To allow external users to access an internal web server through a Core Transit WireGuard tunnel, three firewall and NAT rules must be created on the GL.iNet router. Together, these rules perform destination NAT (DNAT), permit the forwarded traffic, and ensure return traffic is returned through the tunnel.
In this example we will be using a web server operating on port 80 and the following addresses. Running the following commands requires connecting to the router via SSH.
| Item | Address |
|---|---|
| Core Transit Tunnel Endpoint | 192.0.2.0 |
| GL.iNet Tunnel Endpoint | 192.0.2.1 |
| Public Service IP | 192.0.2.9 |
| Internal Web Server | 192.168.8.110 |
Rule 1 - Destination NAT (DNAT)
The DNAT rule translates traffic arriving on the public service IP and forwards it to the internal web server.
Command:
iptables -t nat -I PREROUTING 1 -i wgclient1 -p tcp -d 192.0.2.9 --dport 80 -j DNAT --to-destination 192.168.8.110:80Without this rule, the router receives traffic destined for the public service IP but does not know which internal device should receive it.
Rule 2 - Allow Forwarded Traffic
The firewall must be configured to permit traffic entering through the WireGuard tunnel to reach the internal server.
Command:
iptables -I FORWARD 1 -i wgclient1 -o br-lan -p tcp -d 192.168.8.110 --dport 80 -j ACCEPTWithout this rule, the firewall may block the forwarded connection before it reaches the web server.
Rule 3 - Source NAT (SNAT)
The SNAT rule ensures that return traffic from the web server is sent back to the GL.iNet router and returned through the WireGuard tunnel.
Command:
iptables -t nat -I POSTROUTING 1 -o br-lan -p tcp -d 192.168.8.110 --dport 80 -j SNAT --to-source 192.168.8.1Without SNAT, the web server sees the original Internet client's IP address and may attempt to return traffic through its default gateway instead of the tunnel path. With SNAT enabled, the server sees the GL.iNet router as the source of the connection. This ensures that all responses are returned to the router, allowing the router to properly reverse the NAT translation and send traffic back through the tunnel.
Conclusion
| Rule | Function | Purpose |
|---|---|---|
| DNAT | Public IP to Internal IP Translation | Directs inbound traffic to the correct server |
| FORWARD | Firewall Allow Rule | Permits traffic to traverse the router |
| SNAT | Source Address Translation | Ensures return traffic follows the correct path through the tunnel |
These rules are only required when hosting services behind a Core Transit WireGuard tunnel. They are not necessary for normal outbound Internet access through the tunnel.


